Showing posts with label DIY. Show all posts


Our house is beautiful and spacious but has little storage. So though it is bigger than our last home we have fewer places to put things. One area of the house that has been particularly troublesome is my daughters bedroom and bathroom. She is fast approaching her teenage years and has a tiny bathroom with no vanity drawers for jewelry and hair accessories. So I thought she could store things in her room instead but her closet contained nothing but a closet rod. It was time to install some more storage. I decided on closet tower plans from Ana White. However, I knew I wanted some drawers on my unit so I created a fixed shelf just above where the drawers would begin and installed drawer slides. I don't have my own diy for you on that but Build Basic has a great tutorial on building drawers and on installing drawer slides.


I am super excited with how it turned out. I built the tower and then added shelving and rods to fit my closet, including two lower shelves for shoes.

I don't have a full tutorial on building the tower here since Ana does a great job showing you how to DIY it with her plans. But I thought I would share how I removed the builder grade closet shelving to make room for my new tower.

No matter how careful you are you'll probably make a few gouges into the drywall. Nothing that a little spackling can't take care of!

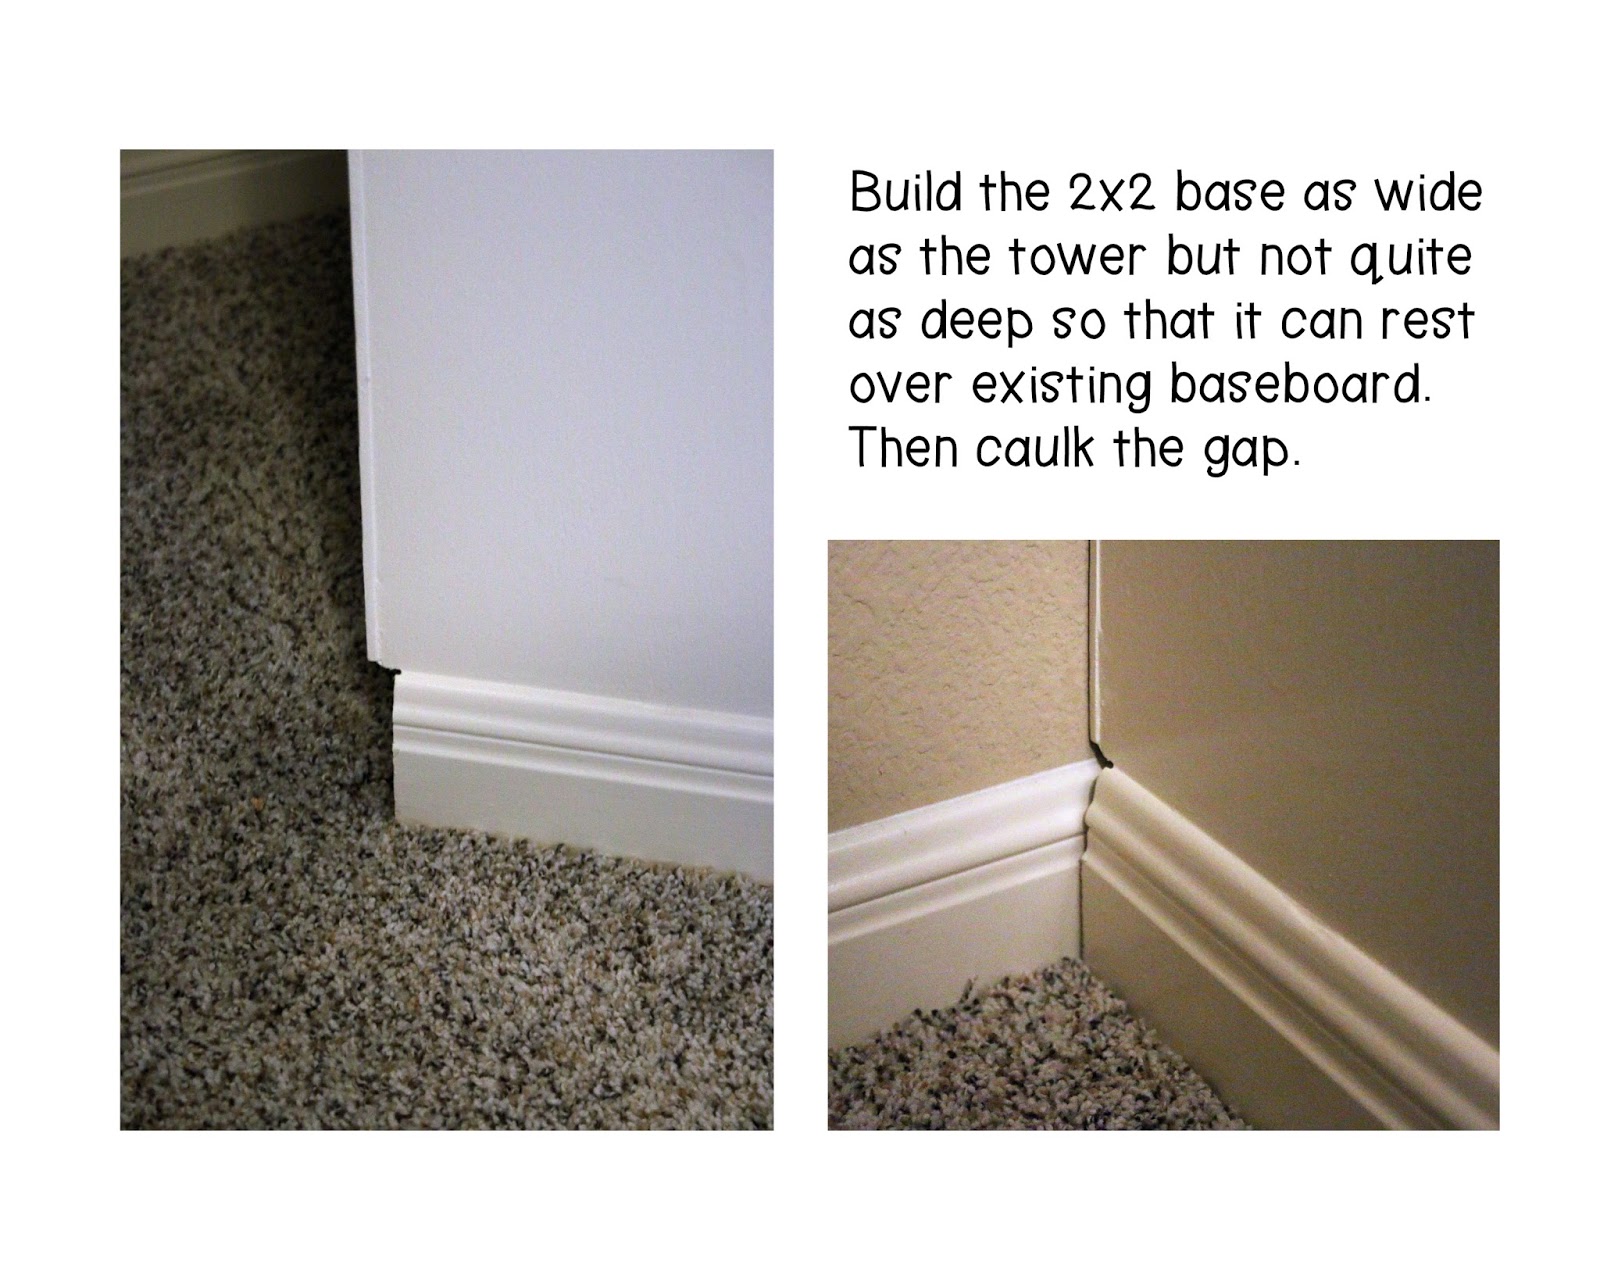
One thing I was really excited about when I saw these plans was the idea to build a base for the tower to fit over the existing baseboard. I knew I really wanted a built in closet but the idea of cutting and removing baseboard was not pleasant. So if you can find baseboard to match what is already in your house, doing it this way is so much easier!


After 15 years of marriage and nothing but hand me downs or thrift store buys, it was time. Time for a nice bed (and hopefully soon, nightstands to match). I decided on the Ana White Queen Farmhouse Bed, and I am so pleased with how it turned out!


Here are some pictures of the bed in progress. Note to self, two men at my local Lowe's said the 4x4 posts I bought from them were too big to cut for me. I think they were being lazy. In any case don't buy wood from them again.


So here's what you have to do when Lowe's won't cut the posts for you. It was hard, messy work but I built some muscle and eventually got four of these cut to size.


Here is the footer sandwiched and clamped together while the wood glue dries.


And here are both the header and footer, assembled, sanded and ready for some stain. I told my husband we had to agree on a color from the Rust-Oleum Ultimate Wood Stain Line since that is my favorite type of stain. It's so easy to use and it dries so fast. We chose American Walnut and I put on two coats.
My laundry room is very small. It has a washer and a dryer and one shelf. A shelf that is so tall I can reach nothing on top of it without a step stool. For two years now I've dealt with it but I couldn't handle the clutter anymore. It was finally time to add some extra shelving. Voila!


I searched pinterest for ideas and found only one that I really liked. This Cleaning Storage Tower from That's My Letter.


But I knew I wanted to paint the whole thing so that eliminated the strong tie hardware. I used 2x2's for the side supports since I had some in my scrap pile. Ana White's console table was the perfect depth for my space so I used depth measurements from that. I also switched the way some of the 2x4's lay; skinny side forward for the front and back supports. Thanks for the inspiration #anawhite and #thatsmyletter!

On to the DIY!

Cut List:

6 - 2x4 @ 20 1/4" (Legs)
13 2x4 @ 20 1/4" (Front and Back Supports)
10 - 2x2 @ 11 1/4" (Side Supports)
2 - 3/4" plywood @ 45" w x 18 1/4" d (long shelves)
2 - 3/4" plywood @ 23 1/4" w x 18 1/4" d (short shelves)
Kreg Jig
Jig Saw
2 1/2" Pocket Hole Screws
1 1/2" Wood screws
Paintable caulk


STEP 1: Make the frames. You'll use 3 of your 83 1/4" 2x4's and 6 of your 20 1/4" 2x4"s for each frame. The space between shelves is about 24 1/4" give or take. Just make sure the spacing is exactly the same on both frames.


STEP 2: Drill one pocket hole at each end of each of your 2x2's. Attach 2x2's with  1 1/2" pocket holes and 2 1/2" pocket hole screws, drilling into the legs of the frame. Then attach to the other frame with the pocket hole on the other side of your 2x2. What I did to do that, was put the frame without the 2x2's, flat on the floor, and then I flipped the 2x2 laden frame over and matched it on top of the plain frame and screwed everything together.


Here is the frame assembled. I forgot to take a picture after I added the 2x4 which now holds my broom, mop, duster, etc. Pictured below is about where you'll want to add your 2x4. Again, use your kreg jig and create pocket holes to attach.


Initially I was going to screw 1x12 boards in between the 2x2 side spacers and 2x4 front and back spacer, like in Ana White's console table plan, but then I remembered that my hubby bought me a jigsaw so I gave the notched plywood boards a try. Here is a board measured, marked, and ready to be cut.


And here is the shelf in position.


After the shelves were cut and in place I countersunk 1 1/2" wood screws through the plywood and into the supports to secure. Then I used wood filler where it was needed and sanded everything down. Then I used paintable caulk to seal any additional cracks (mostly around where the plywood was notched). I then used two coats of Behr Marquee paint in Falling Snow (PPU 18-7) to cover it, followed by two coats of Minwax water based Polycrylic.


And a view taken as I perch precariously on top of my dryer and lean against the side wall.


You can see that I installed two large utility hooks underneath the top 2x2 support, to hold my ironing board. I found them at Home Depot for around $2 each. I also found the spring grip bar at Home Depot for around $7. 


I am still playing around with organizing it, but already I am enjoying so much extra storage space!
I've been wanting to organize our kitchen drawers since we moved in. I found some organizers at thrift stores that worked as a temporary solution but they were very inefficient. They were too small for the drawers and left inches of awkward and unused space. Well I have finally built custom organizers for our kitchen drawers!


 My inspiration came from Kevin & Amanda via Pinterest. I looked at their pictures and then went to my local hardware store to find what worked best for me. Here is what I used and how I put them together:

Materials

Hammer
Miter Saw
Measuring Tape
Wood Glue
#18x3/4" Wire Brads
Poplar Boards at .25"x2.5"x48"


How to

Decide on how you want to arrange your drawer, measure your boards to fit and then cut the boards. Once I did that I dabbed some wood glue on the boards, stuck them together and then nailed two brads where the boards met. I did not glue or nail the inserts into the drawers. That way, as you can see from the picture below, they can be easily removed for drawer clean out.


Yeah, pretty much the second I was done with the sofa table I started on this. After looking high and low for a storage bench plan that I liked I found one at Rambling Renovators. I only made the larger segment and decided to place the hinges farther back, but I mostly followed their directions. It's not perfect but now I'm not tripping over tools and bags of fertilizer and the like when I go out onto the porch. Oh and the color I used is Mission Control by Behr.
So for a long long long long long long (like in 9th grade) long long long time now I have been greatly desiring to pick up some wood working skills. Sometimes, when I am really interested in learning something new that I know will be more challenging to me, I read and study and visualize and read some more about how to do that thing. Then, when I think I have a solid enough understanding (or when I'm desperate enough to try to create that perfect thing I can't seem to find anywhere else) I take the plunge.

So armed with plans for a console table from Ana White, a friends Kreg Jig, and lumber, I dove in. Here are most of the pieces for the table, all cut up by the lumber store employees:


I changed the length of the original design to fit behind our couch. Here is a picture of one of the frames in progress. At first I was having a hard time getting the pocket holes centered, but eventually I figured out how to be consistent.


And here is the table all put together, awaiting a good sanding. I didn't add the x-braces. I tried but couldn't cut them to fit just right.


To finish the table I started by staining the top. I used Minwax Pre-Stain Wood Conditioner. Then over that I used Minwax Polyshades Stain & Polyurethane in 1 Step in Honey color with Satin finish. I did three coats.


Then I primed the base of the table with Zinsser Bulls Eye 123 Primer for all Surfaces. The paint I used to coat the primer was Behr Premium Plus ULTRA Stain-Blocking Paint & Primer in One, Interior Satin Enamel. I had it tinted to Crisp Linen White.


After the paint dried I went over the base with more of the Honey Stain, brushing it on and wiping it off almost immediately after each segment was coated. This gave some depth and weathering to the look and gave it a richer tone. Compare the picture above and below, though it's not as easy to see in photos.


And here it is behind our sofa, waiting for some decor. It may have been crazy as a very first woodworking project but I do crazy well the majority of the time. I definitely made some errors in building and finishing but because of that I learned a lot. I think my next project will go much smoother.


I am VERY picky when it comes to peppermint ice cream. It's a seasonal indulgence that I love, but only if it's just right. They say you eat with your eyes and when it comes to peppermint ice cream, I know whether or not I'll enjoy a certain brand simply by the way it looks.

Are there actual peppermint pieces in the ice cream? If not, there's no way I'll touch it. I have to have little peppermint crunchies with every bite.

Does it have a more spearmint flavor than peppermint flavor? I adore the sweeter spearmint flavor!

Is the color of the ice cream only pink with red peppermint pieces? I might eat it but it's nowhere near as tasty as a white ice cream with red AND green peppermint pieces mixed in.

I know. It's all in my head but thus it is.

So  being that I'm in the mood for peppermint ice cream and finding not one brand that fit my idea of perfection, I set about to make my own. After perusing pinterest I settled on this recipe, with one change: I substituted two teaspoons of vanilla extra for the peppermint extract and added 1/4 teaspoon of mint extract. Below is the basic custard mixture ready for the ice cream machine.


To prevent my crushed candy cane pieces from completely dissolving in the ice cream I waited until the last possible moment of churning to add them to the mix. Then immediately placed into the freezer to become more solid. After crushing the pieces I put them in a collander to sift out the tiniest flakes which might dissolve anyway and totally discolor the ice cream. I don't mind red and green swirls. I just don't want them mixing so much I get brown ice cream.


And here is the finished product, sprinkled with a few reserved candy cane flakes. I highly recommend this recipe. I will use it as a base for other flavors from here on out.This ice cream is so creamy; no ice crystals at all. Crunchy peppermint pieces and smooth ice cream. Yum!!


  • Peppermint Ice Cream - from www.sproutedkitchen.com

  • 5 egg yolks
  • 1 cup sugar
  • 1 1/2 cups milk
  • 2 cups heavy cream
  • 2 teaspoons cornstarch
  • 2 teaspoons peppermint extract
  • 1/2 cup crushed peppermint candies
Set a large glass bowl above a pot of simmering water, not letting the bottom of the bowl touch the water line. Add the egg yolks and sugar into the bowl and stir occasionally until the sugar has mostly dissolved the the yellow has paled in color. About 5 minutes. Set the bowl aside.
Mix 1/4 cup of the milk with the cornstarch and set aside to dissolve. Empty the water from the pot, put the remaining milk and cream in the pot over medium heat and warm until bubbles form on the outer edges. Slowly add the warm cream to the yolks, stirring as you add to temper. Stir in the cornstarch mixture and the peppermint extract.
Chill the mixture in the fridge for at least an hour. 
Put the mixture in an ice cream maker and churn according to instructions. In the last minute, add the peppermint candies. Take a bite, if its not quite minty enough for you, add another splash of extract. Transfer the mixture to a container for the freezer, and freeze for at least a few hours to firm up.
My last post was April 9. On that day or the next I got a call from my sister in law. Her son and his longtime girlfriend had announced a few days before that they would be tying the knot. On April 18th. In 9 days. And would I make the wedding cake?

So I've been busy. The bride to be sent me a picture of her dream wedding cake, a beautiful and classic creation made by Sedona Wedding Cakes, shown below:


 I knew my rendition wouldn't look exactly the same as every cake artist does things a bit differently, adds their own personal style I guess. Also I had never made calla lilies before but I've modeled in fondant and polymer clay a lot so was certain I could do it. As the creator I can see every little imperfection but it was a good learning experience, lots of fun to make and I really am pleased with it.


The bottom tier was white chocolate cake with white chocolate buttercream, the middle tier was strawberry cake with strawberry buttercream and the top tier was vanilla cake (a cooks illustrated recipe) with vanilla buttercream. Hopefully I'll get a short tutorial about how to make your own gumpaste calla lilies published within the next few days.
So wearing jewelry when you have small children around is not always the best idea.

I decided last night to repair three of my necklaces that have been broken by the tugging of little hands. Now that my youngest is 2 and understands much more about the word NO, maybe we won't have any more mishaps, though I'm not counting on it. After I fixed my necklaces I decided to dig through my bead stash and see if I could find inspiration for creating something else. I often like to grab pretty jewelry making things off the clearance rack at the craft store and see what I can come up with later. So I made two pairs of earrings last night.


 I love these yellow and cream danglers already. I was trying to figure out what to put with the crystal flowers when I found the tear drop glass pearls. I think they have a glamorous vintage feel.


And then these stud based mini dangles were easy, they really didn't need extra adornment. Simple but eye catching.

I haven't made every piece of jewelry I own but it sure is nice to be able to quickly create a piece for an outfit when you can't find anything to buy that really works.
Before I begin this post I'll have you know that I am no crochet expert. I scoured the internet for a satisfactory post on how to join fine yarn motifs with pointy edges and didn't find anything that specific so I decided I would sit down, stare at two motifs with yarn in hand for a while and settle on whatever felt best to me. Here is how I joined my flower motifs.

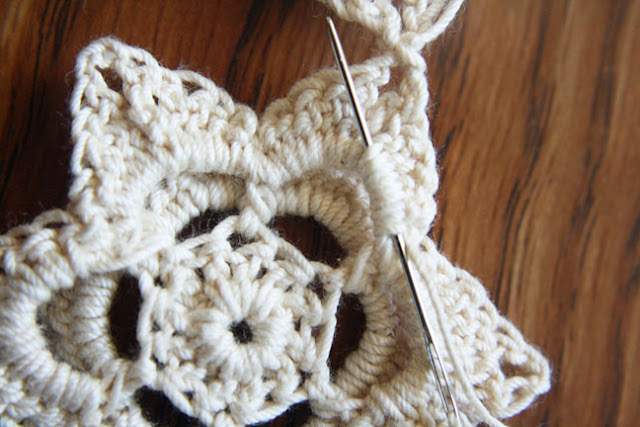
First turn your motifs over so the back sides are facing you. Run a piece of yarn through each motif at the spot they will be joined together.


Tie an overhand knot and pull tight. I know that knot tying in crochet is supposedly a no no but the yarn I used was so fine that you can't even tell. You could even tie an overhand knot twice for extra security, just do NOT cut off the ends!


Now with your knot secured it's time to weave in the ends. You could weave in each side individually or you could hold the strands together and weave them in. I chose to do the latter, though I only used one strand for the demonstration pictures.


Zig zag the yarn up and down through the back stitches at the top of your petal as shown. Up:


Down through the next stitch.


Do this until you reach the base of the petal as shown below.


Now you're going to draw your yarn up through the back row of stitches on the same petal like so:


Once you've drawn it through the back of the petal, pull the yarn a little bit taut and cut it off right near where it comes out of the stitches. If the yarn is sticking out just pull on the petal a little until it disappears into the work. Below is the flower part of my bodice fully assembled and waiting for the next step.

From Summer Owens | Photography, Crochet, Food, Crafts and More