Showing posts with label Food. Show all posts
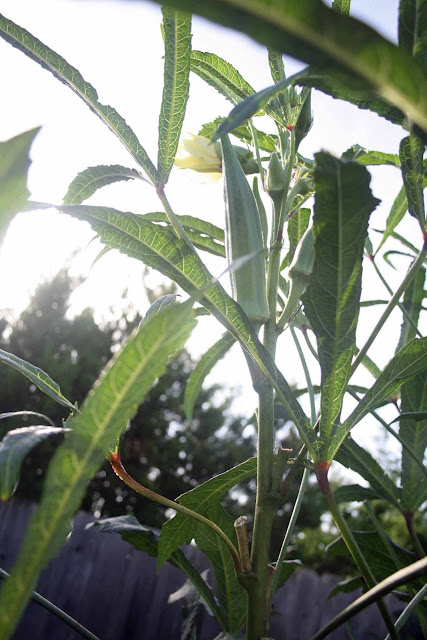
Each planting season we have found fruits and vegetables that succeed and those that don't. Along with eggplant, green beans, carrots, snap peas, beets, tomatoes, strawberries and butternut squash, okra is a prolific plant here in the Austin area climate. I had never even seen an okra plant before my husband decided he wanted to try growing some. They sprout up into tall thick stalks with fruit growing skyward out of pale yellow flowers.


Some people shy away from okra because of the mucilage it contains. But the mucilage can be good in certain dishes for thickening things. Okra is often an ingredient in gumbo. If you don't like to see tiny strands of so called "slime" in your okra it's not hard to avoid. You can cook the okra whole to minimize it or if sliced, cook it off. I made okra curry recently and sauteed sliced okra until the goo was gone.  It's a healthy fruit containing soluble fiber, vitamin C and folate. Here is an article touting the benefits of okra.


I remember when I was in school often thinking things like, "Why do I need to know this?" or "When am I ever going to use this?" and being really annoyed at things I was made to learn that seemed to have no practical application whatsoever. I enjoyed most everything I learned, including science (the no math parts of it) but I hated math with a passion. Up until this last year even, I felt like I was literally incapable of learning mathematics above a 6th grade level. I knew that my kids could learn math using some fantastic online resources and from their dad, so I wasn't concerned about that as far as homeschooling went, but as we've gone through the year I've realized that if they can succeed at mathematics, maybe I can too? It still does not come easily for me but I'm trying. I signed myself up for Khan Academy and am very slowly starting to grasp basic concepts that I never fully understood.

I've tried hard not to pass on my hatred of math to my kids and I've hoped to encourage better attitudes in them towards the subject by showing them how often math is used every day and that it is used in creating so many things that they love to do (toys, video games, movies, etc.).

The same goes with science. I want them to understand the science behind some of the things we do to help make science more relatable. Since I think basic life skills are very important as well I've been trying to teach them the math and science involved in those things, whether it be building a box, proper hygiene habits or baking a loaf of bread. I don't just want to show them how to make bread or tell them only that we knead bread. I want them to know why we knead bread. So today I supervised them in making a basic loaf of white bread. Didn't they do a great job?


We followed this simple recipe and while the bread was on its first rise we watched the following videos:


The kids were wishing we could inflate our own blobs of gluten. I wonder if a bike pump would work?

Another great resource for the science of making bread is a book by Emily Beuhler. Please note that while I am not an amazon affiliate, the link below will take you to the Amazon Marketplace listing, where you can preview the book.

Bread Science: The Chemistry and Craft of Making Bread

Here is a simple experiment you can do to show the kids how yeast works in bread:

Yeast Experiment


I am VERY picky when it comes to peppermint ice cream. It's a seasonal indulgence that I love, but only if it's just right. They say you eat with your eyes and when it comes to peppermint ice cream, I know whether or not I'll enjoy a certain brand simply by the way it looks.

Are there actual peppermint pieces in the ice cream? If not, there's no way I'll touch it. I have to have little peppermint crunchies with every bite.

Does it have a more spearmint flavor than peppermint flavor? I adore the sweeter spearmint flavor!

Is the color of the ice cream only pink with red peppermint pieces? I might eat it but it's nowhere near as tasty as a white ice cream with red AND green peppermint pieces mixed in.

I know. It's all in my head but thus it is.

So  being that I'm in the mood for peppermint ice cream and finding not one brand that fit my idea of perfection, I set about to make my own. After perusing pinterest I settled on this recipe, with one change: I substituted two teaspoons of vanilla extra for the peppermint extract and added 1/4 teaspoon of mint extract. Below is the basic custard mixture ready for the ice cream machine.


To prevent my crushed candy cane pieces from completely dissolving in the ice cream I waited until the last possible moment of churning to add them to the mix. Then immediately placed into the freezer to become more solid. After crushing the pieces I put them in a collander to sift out the tiniest flakes which might dissolve anyway and totally discolor the ice cream. I don't mind red and green swirls. I just don't want them mixing so much I get brown ice cream.


And here is the finished product, sprinkled with a few reserved candy cane flakes. I highly recommend this recipe. I will use it as a base for other flavors from here on out.This ice cream is so creamy; no ice crystals at all. Crunchy peppermint pieces and smooth ice cream. Yum!!


  • Peppermint Ice Cream - from www.sproutedkitchen.com

  • 5 egg yolks
  • 1 cup sugar
  • 1 1/2 cups milk
  • 2 cups heavy cream
  • 2 teaspoons cornstarch
  • 2 teaspoons peppermint extract
  • 1/2 cup crushed peppermint candies
Set a large glass bowl above a pot of simmering water, not letting the bottom of the bowl touch the water line. Add the egg yolks and sugar into the bowl and stir occasionally until the sugar has mostly dissolved the the yellow has paled in color. About 5 minutes. Set the bowl aside.
Mix 1/4 cup of the milk with the cornstarch and set aside to dissolve. Empty the water from the pot, put the remaining milk and cream in the pot over medium heat and warm until bubbles form on the outer edges. Slowly add the warm cream to the yolks, stirring as you add to temper. Stir in the cornstarch mixture and the peppermint extract.
Chill the mixture in the fridge for at least an hour. 
Put the mixture in an ice cream maker and churn according to instructions. In the last minute, add the peppermint candies. Take a bite, if its not quite minty enough for you, add another splash of extract. Transfer the mixture to a container for the freezer, and freeze for at least a few hours to firm up.
My last post was April 9. On that day or the next I got a call from my sister in law. Her son and his longtime girlfriend had announced a few days before that they would be tying the knot. On April 18th. In 9 days. And would I make the wedding cake?

So I've been busy. The bride to be sent me a picture of her dream wedding cake, a beautiful and classic creation made by Sedona Wedding Cakes, shown below:


 I knew my rendition wouldn't look exactly the same as every cake artist does things a bit differently, adds their own personal style I guess. Also I had never made calla lilies before but I've modeled in fondant and polymer clay a lot so was certain I could do it. As the creator I can see every little imperfection but it was a good learning experience, lots of fun to make and I really am pleased with it.


The bottom tier was white chocolate cake with white chocolate buttercream, the middle tier was strawberry cake with strawberry buttercream and the top tier was vanilla cake (a cooks illustrated recipe) with vanilla buttercream. Hopefully I'll get a short tutorial about how to make your own gumpaste calla lilies published within the next few days.


Apple Pie is one of my all time favorite eats. It's just so homey and delicious. The epitome of comfort food. When my husband requested it this weekend, I simply had to oblige.


Pie is my favorite baked good to create. There's something so therapeutic for me in working the dough. The recipe I use is so basic but it turns out perfect every time. I'll let you in on a secret. I don't use a pastry cutter. I've yet to find one that doesn't mash the mixture together. And though I don't know the science behind it, if you mash your butter into the dry ingredients your pie crust is going to be heavy and gluey. It seems strange since you gather it all together at the end anyway but trust me. I've got experience with this.

Flaky Buttery Pie Crust

2 1/2 cups all-purpose flour
1/2 tsp. salt
1 cup chilled, unsalted butter
7-8 Tbsp. ice water

*Whisk the flour and salt together in a bowl. Cut in the butter with two knives until mixture resembles coarse crumbs. Or you can pulse the ingredients together in a food processor for a few 1 second pulses. Drizzle ice water over the flour mixture and toss with a fork to moisten. Gently gather the dough together with your hands and then divide dough, rolling out each section onto a floured surface. One crust for the bottom and one for the top. Drape one prepared disc into your pie pan and trim.


I know in the instructions I tell you that you can use a food processor. This way is super fast and works great as long as you don't over pulse, but I've only ever done it once. That's just because I love to work with the dough even in this stage. I always use butter knives to cut the butter into the flour mixture, initially. Then, and here's another secret, I use my fingers to finish it off. I don't know if there is a name for this method I use but I lightly rub the remaining clumps of butter and flour together through my fingertips, just tossing and lightly rubbing the mixture and in no time at all it attains the perfect pebbly texture.


Apple Pie Filling

7 Large Pink Lady Apples, peeled and sliced
*Depending on how packed you like your pie you may want to use more apples.
1/2 cup white sugar
1/4 cup packed dark brown sugar
1/4 teaspoon salt
3 Tablespoons cornstarch
If you use more apples that will create more juice so you may need to up your cornstarch depending on your desired thickness
1/4 teaspoon grated lemon zest
2 Tablespoons fresh squeezed lemon juice
1/8 teaspoon ground cinnamon
1 egg white
1 Tablespoon heavy shipping cream

1. Preheat your oven to 400 degrees

2. In a small bowl whisk together the cornstarch and lemon juice

3. In a dutch oven or heavy saucepan combine the apples, sugars, salt, lemon zest and lemon juice and cornstarch mixture. Cover and cook over medium heat stirring often for about 15 minutes or until apples are tender.

4. Pour the apple mixture into your prepared pie shell, top with your other pie crust and seal the edges. Cut some slits to vent or have fun and use a cookie cutter for cute shapes on the top. Cut out the shapes before you drape the pie though.

5. Lightly whisk together the egg white and whipping cream and then using a pastry brush gently brush the top crust and edges with the mixture. This will help with make the crust a beautiful golden. Lightly sprinkle some cinnamon and sugar on top.

6. Bake in a 400 degree oven for 25-30 minutes or until golden and bubbly. I recommend protecting the crust edge with some foil or a pie crust ring and then removing the ring for the last 10 minutes or so of baking.


After the pie came out of the oven I sprinkled it with some white sanding sugar, just to add a little extra pretty. And was the pie delicious? Why yes. Yes it was.


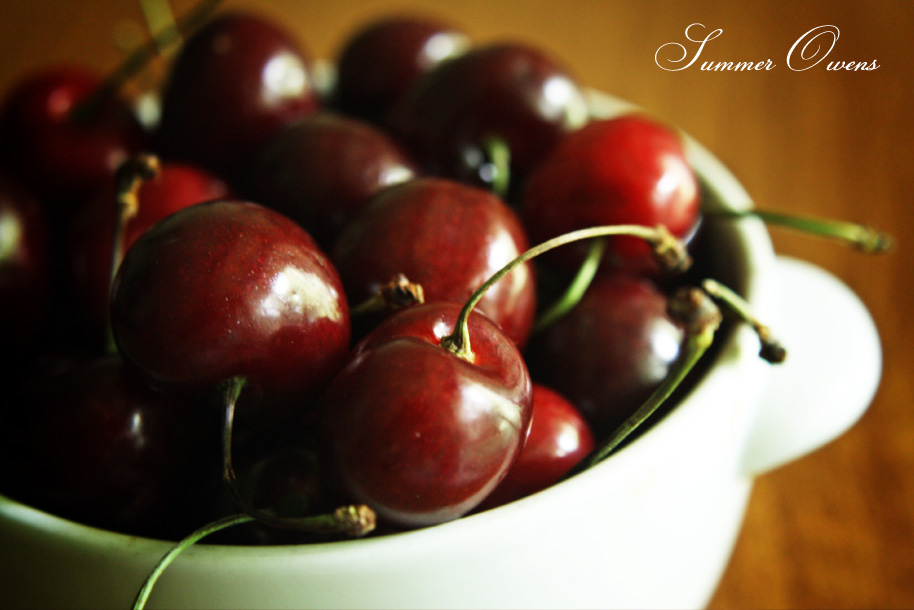
Know what? I use to hate cherries. I remember trying one when I was about 12. It tasted terribly sour and I was thereafter convinced that cherries were an awful fruit that no one ever ought to eat. Now, in spite of that, over the years I have had two or three cherry desserts. Desserts I partook of simply to be polite. Desserts that while sweet (unlike my first experience with a cherry) were texturally nauseating. Literally painful for me to chew. However, I am a person who has vowed to keep trying the disliked foods of my past, just in case my taste buds mature. Plus, the thought occurred to me, that perhaps I had only ever eaten canned cherry dishes. So when I saw these beautiful sweet cherries on sale yesterday I had to buy some.


And what better dish to make when trying a fresh baked cherry for the first time than a simple pie? Plus I'd been wanting to make pie for weeks. There is just something wonderful about pie. Making and perfecting the crust and filling is very therapeutic for me. It's my favorite dessert to make. I put a favorite, Buttermilk Pie, on hold for this cherry pie but I'm sure I'll get around to that one all too soon.


For the crust I added a sugary milk wash and sprinkled sliced almonds over the top. And just look at that flakiness. I use the simplest of pie crust recipes but it never fails me and is wonderfully buttery.


Flaky Buttery Pie Crust

1 1/4 cup all-purpose flour
1/4 tsp. salt
1/2 cup chilled, unsalted butter
3-4 Tbsp. ice water

*Whisk the flour and salt together in a bowl. Cut in the butter until mixture resembles coarse crumbs. Drizzle ice water over the flour mixture and toss with a fork to moisten. Gently gather the dough together and roll out on a floured surface. Double this recipe to make a top crust.


And so, when it comes to cherries, I've discovered that sweet ones are actually very good raw. I've also discovered that while canned, baked cherries make me want to puke, fresh baked cherries have a lovely flavor and texture. Here's to more cherry pies to come over the years.
Brazilian Limeade
* courtesy of my husband who lived in Brazil for two years

3 cups water
1/2 cup ice
2 medium limes, whole
1/3 cup sugar
1/3 cup sweetened condensed milk
1.Place all ingredients in a blender and blend until smooth
2. Taste and add more sugar if needed.
2. Drink immediately. Do not store in the fridge. If stored, the drink will become very bitter due to the lime peel within.
So I had gotten on here to write a blurb about a happy time making blueberry pie with my kiddos just 40 minutes ago. I was thinking pleasant thoughts about the color of blueberries, my childrens eagerness to help pour in each ingredient and roll out the pie crust, how wonderful it is to bake and cook with your kids, and how we should all take some time now and again to make food the old fashioned way, when suddenly my nose detected a scent.
Is that…smoke?
I turned my head from the computer screen to see smoke pouring out of the kitchen.
“Oh no!” I yelled as I ran toward the oven.
My kids, hearing my yell, immediately dropped what they were doing. With concerned voices they asked what was wrong.
“Somethings burning,” I replied more calmly, grabbing the oven mitt.

I had forgotten that the word “burning” to kids, is code for, start freaking out.
At that moment I opened the oven door, which in turn caused a huge cloud of smoke to billow out. Ethan started yelling at Caleb not to go into the kitchen. Caleb began a series of shrill screams.
“Hurry,” Ethan said with plugged nose, “lets run to the bedroom before the smoke gets us!”
So off they went, leaving me to manage the damage without going deaf.

As I waved the smoke away I saw my mistake. I had forgotten to place a cookie sheet underneath my pie and blueberry goop was overflowing from one side of the pan. It bubbled and sizzled on the bottom of the oven.

I quickly pulled the oven rack out, grabbed a spatula and started scraping the burnt goo out of the oven and dumping it in the sink. The process was quick, and with a little hand waving and wide open sliding door, order was restored.

Now I just have to convince the kids that the presence of smoke in the oven, does not mean I burnt the pie.

Blueberry Pie

3/4 cup white sugar
3 Tbsp. cornstarch
1/4 tsp. salt
1/2 tsp. ground cinnamon
4 cups fresh blueberries, rinsed and drained
Butter
Recipe for 9 inch pie crust, doubled
1. Preheat oven to 425 degrees
2. In a large bowl stir together sugar, cornstarch, salt and cinnamon. Add blueberries and gently combine till berries are well coated
3. Line 9 inch pie plate with pie crust and pour berry mixture inside. Dot with butter.
4. Add a lattice top and seal the edges. Brush with egg white for shine.
5. Bake pie on lower shelf in the over for 40 to 50 minutes or until pie is bubbly and top is golden brown.

Flaky Pie Crust

1 1/4 cup all-purpose flour
1/4 tsp. salt
1/2 cup chilled, unsalted butter
3-4 Tbsp. ice water

*Whisk the flour and salt together in a bowl. Cut in the butter until mixture resembles coarse crumbs. Drizzle ice water over the flour mixture and toss with a fork to moisten. Gently gather the dough together and roll out on a floured surface. Double this recipe to make a top crust.