Showing posts with label Woodworking. Show all posts


Our house is beautiful and spacious but has little storage. So though it is bigger than our last home we have fewer places to put things. One area of the house that has been particularly troublesome is my daughters bedroom and bathroom. She is fast approaching her teenage years and has a tiny bathroom with no vanity drawers for jewelry and hair accessories. So I thought she could store things in her room instead but her closet contained nothing but a closet rod. It was time to install some more storage. I decided on closet tower plans from Ana White. However, I knew I wanted some drawers on my unit so I created a fixed shelf just above where the drawers would begin and installed drawer slides. I don't have my own diy for you on that but Build Basic has a great tutorial on building drawers and on installing drawer slides.


I am super excited with how it turned out. I built the tower and then added shelving and rods to fit my closet, including two lower shelves for shoes.

I don't have a full tutorial on building the tower here since Ana does a great job showing you how to DIY it with her plans. But I thought I would share how I removed the builder grade closet shelving to make room for my new tower.

No matter how careful you are you'll probably make a few gouges into the drywall. Nothing that a little spackling can't take care of!

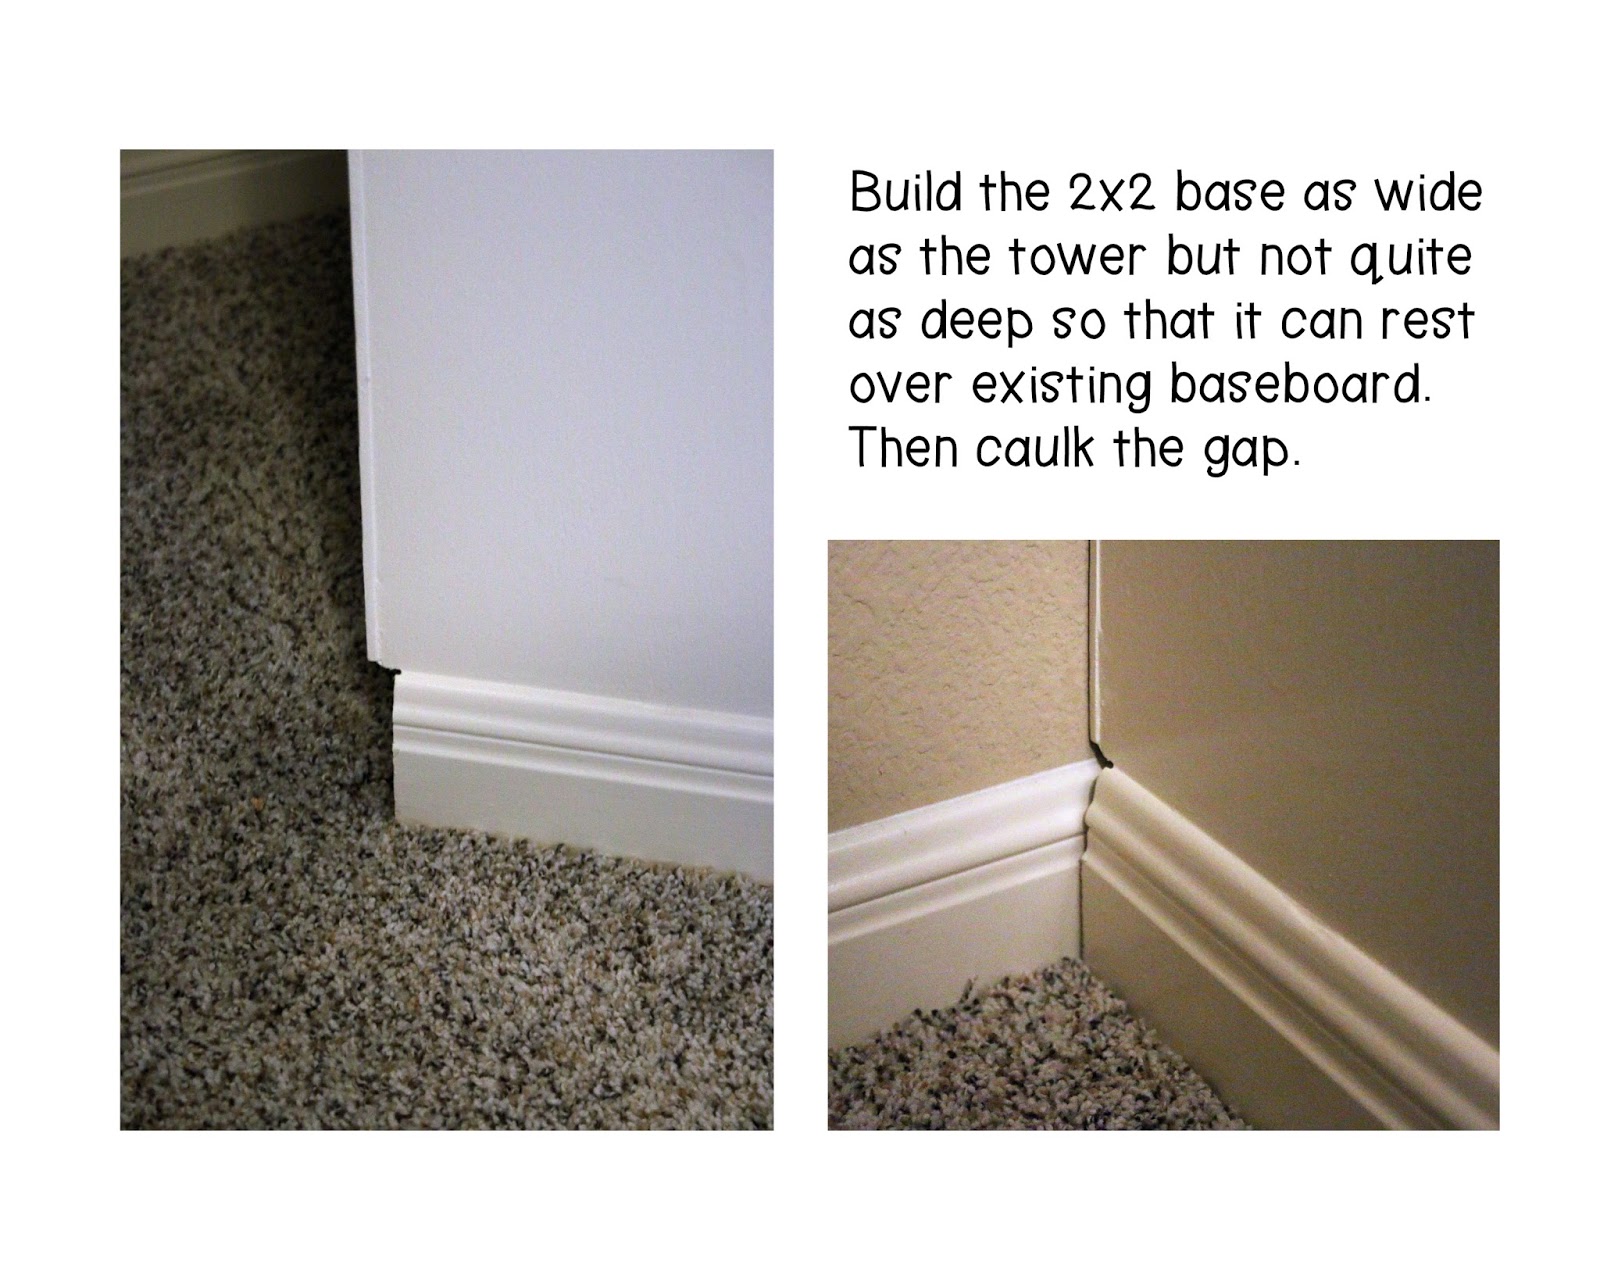
One thing I was really excited about when I saw these plans was the idea to build a base for the tower to fit over the existing baseboard. I knew I really wanted a built in closet but the idea of cutting and removing baseboard was not pleasant. So if you can find baseboard to match what is already in your house, doing it this way is so much easier!


After 15 years of marriage and nothing but hand me downs or thrift store buys, it was time. Time for a nice bed (and hopefully soon, nightstands to match). I decided on the Ana White Queen Farmhouse Bed, and I am so pleased with how it turned out!


Here are some pictures of the bed in progress. Note to self, two men at my local Lowe's said the 4x4 posts I bought from them were too big to cut for me. I think they were being lazy. In any case don't buy wood from them again.


So here's what you have to do when Lowe's won't cut the posts for you. It was hard, messy work but I built some muscle and eventually got four of these cut to size.


Here is the footer sandwiched and clamped together while the wood glue dries.


And here are both the header and footer, assembled, sanded and ready for some stain. I told my husband we had to agree on a color from the Rust-Oleum Ultimate Wood Stain Line since that is my favorite type of stain. It's so easy to use and it dries so fast. We chose American Walnut and I put on two coats.
My laundry room is very small. It has a washer and a dryer and one shelf. A shelf that is so tall I can reach nothing on top of it without a step stool. For two years now I've dealt with it but I couldn't handle the clutter anymore. It was finally time to add some extra shelving. Voila!


I searched pinterest for ideas and found only one that I really liked. This Cleaning Storage Tower from That's My Letter.


But I knew I wanted to paint the whole thing so that eliminated the strong tie hardware. I used 2x2's for the side supports since I had some in my scrap pile. Ana White's console table was the perfect depth for my space so I used depth measurements from that. I also switched the way some of the 2x4's lay; skinny side forward for the front and back supports. Thanks for the inspiration #anawhite and #thatsmyletter!

On to the DIY!

Cut List:

6 - 2x4 @ 20 1/4" (Legs)
13 2x4 @ 20 1/4" (Front and Back Supports)
10 - 2x2 @ 11 1/4" (Side Supports)
2 - 3/4" plywood @ 45" w x 18 1/4" d (long shelves)
2 - 3/4" plywood @ 23 1/4" w x 18 1/4" d (short shelves)
Kreg Jig
Jig Saw
2 1/2" Pocket Hole Screws
1 1/2" Wood screws
Paintable caulk


STEP 1: Make the frames. You'll use 3 of your 83 1/4" 2x4's and 6 of your 20 1/4" 2x4"s for each frame. The space between shelves is about 24 1/4" give or take. Just make sure the spacing is exactly the same on both frames.


STEP 2: Drill one pocket hole at each end of each of your 2x2's. Attach 2x2's with  1 1/2" pocket holes and 2 1/2" pocket hole screws, drilling into the legs of the frame. Then attach to the other frame with the pocket hole on the other side of your 2x2. What I did to do that, was put the frame without the 2x2's, flat on the floor, and then I flipped the 2x2 laden frame over and matched it on top of the plain frame and screwed everything together.


Here is the frame assembled. I forgot to take a picture after I added the 2x4 which now holds my broom, mop, duster, etc. Pictured below is about where you'll want to add your 2x4. Again, use your kreg jig and create pocket holes to attach.


Initially I was going to screw 1x12 boards in between the 2x2 side spacers and 2x4 front and back spacer, like in Ana White's console table plan, but then I remembered that my hubby bought me a jigsaw so I gave the notched plywood boards a try. Here is a board measured, marked, and ready to be cut.


And here is the shelf in position.


After the shelves were cut and in place I countersunk 1 1/2" wood screws through the plywood and into the supports to secure. Then I used wood filler where it was needed and sanded everything down. Then I used paintable caulk to seal any additional cracks (mostly around where the plywood was notched). I then used two coats of Behr Marquee paint in Falling Snow (PPU 18-7) to cover it, followed by two coats of Minwax water based Polycrylic.


And a view taken as I perch precariously on top of my dryer and lean against the side wall.


You can see that I installed two large utility hooks underneath the top 2x2 support, to hold my ironing board. I found them at Home Depot for around $2 each. I also found the spring grip bar at Home Depot for around $7. 


I am still playing around with organizing it, but already I am enjoying so much extra storage space!